This post was originally published on December 13, 2016
The latest update to this post was made 3 years ago.
 Windows 10 Sysprep Was Not Able To Validate Your Windows Installation
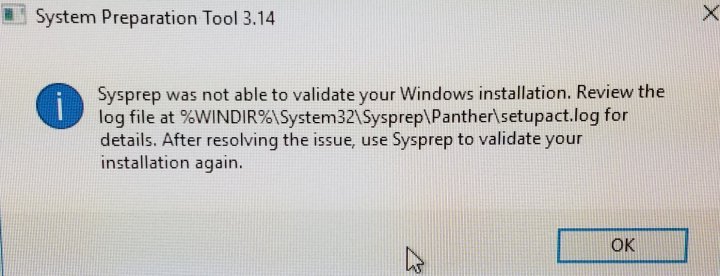
If you have built a Windows 10 reference (master) machine and you are ready to sysprep, but upon running sysprep, you are presented with the error “Sysprep was not able to validate your Windows installation“, this article may help you resolve this issue. Often, this error is caused by a Windows app (AKA metro apps). These apps were introduced in Windows 8 and caused a similar sysprep error “A fatal error occurred while trying to sysprep the machine“.
 Image : Sysprep was not able to validate your Windows installation error screen.
 IMPORTANT: NEVER try to sysprep your master image drive! Always make a copy and sysprep the copied drive! Use a cloning tool like Ghost or a disk duplicator to photocopy your source drive. A failed sysprep can trash your master drive, making it where you have to start over. We have been through this after spending 3 days building the “perfect image”!
Things to check first:
- Is Windows activated with a valid license?
- Be sure the reference image is activated.
- Did you upgrade an existing install?
- Although upgrading an existing version of Windows can be done and with reports of success, you should always build master images fresh from the DVD or ISO. If you upgraded:
- Using REGEDIT, make sure the following registry key is NOT present, if it is, delete it! (only the upgrade key is deleted!)
- HKEY_LOCAL_MACHINE\SYSTEM\SETUP\UPGRADE
- Using REGEDIT, make sure the following registry key is NOT present, if it is, delete it! (only the upgrade key is deleted!)
- Make sure your reference image only contains the needed software.
- Be sure all Windows Updates are applied to the reference image.
- Although upgrading an existing version of Windows can be done and with reports of success, you should always build master images fresh from the DVD or ISO. If you upgraded:
- Have you restarted?
- As simple as this sounds, its troubleshooting 101. Try a restart, if you haven’t already done so.
- Windows must be in a fully clean state before sysprep can successfully complete.
- 0x80073cf2 failure?
- Try running the following command from a powershell prompt (run powershell as an admin!)…
- Find the powershell program, right-click and ‘run as administrator’. Execute the following command:
- Get-AppxPackage -AllUsers| Foreach {Add-AppxPackage -DisableDevelopmentMode -Register “$($_.InstallLocation)\AppXManifest.xml”}
- Did you install any apps from the App Store or update any apps on your reference image?
- If you installed any apps from the store this can cause problems for imaging. There are a couple of known apps that cause trouble for Sysprep, starting with the Windows 10 1511 release: “Candy Crush Soda Saga” and “Twitter“. You can easily remove these two apps by right-clicking them and choosing ‘uninstall’ or using powershell. (Powershell steps on page 2 of this article).
- Have you reviewed your setupact.log file, located at c:\windows\system32\sysprep\panther?
- This file contains the active log of events executed during sysprep. It can be a long file and a bit confusing, but if you look towards the end, you’ll likely find the culprit app that was causing the issue. See our sample file setupact.log file – pulled from a real sysprep failed reference image. Note, in the excerpt below, the yellow highlighted fields are pointing to a failed package “Microsoft.WindowsCamera_2016.1028.10.0_x64_8wekyb3d8bbwe“.
 Image : Highlighted areas of setupact.log file showing where sysprep failure occurred.
(Click image for larger view)
In our case, this app was in error because we created a local user account, along with the administrator account which the reference image was built on. Since we had logged in to the local user account (a service account for technicians to use) to customize the background, etc. the camera app was provisioned for that account, causing this error. We didn’t want to remove the ‘windows camera’ app – so to correct this issue (workaround) we just deleted the technician local account, including files from the control panel/user manager. We re-created the local account BUT DID NOT LOGIN TO IT. Sysprep was then able to run with no problems from the administrator account.
You can remove the offending applications using powershell:
- Launch powershell as an administrator (Find the powershell icon, right-click and choose ‘run as administrator’).
- The command is: Get-AppxPackage <APPNAME> | Remove-AppxPackage
- Where <APPNAME> is replaced by the offending application(s) from the setupact.log file. In the above example, if we wanted to remove the Microsoft.WindowsCamera app, we would use the command get-appxpackage Microsoft.WindowsCamera_2016.1028.10.0_x64_8wekyb3d8bbwe | remove-appxpackage.
REMINDERS:
- If you login with any additional user accounts, you’ll likely toast your chances of sysprep running correctly.
- Only use the single administrator account on your reference image.
- Provisioned apps are installed when a user first signs on.
- Make a copy of your master drive BEFORE attempting any fixes as a failed sysprep can render the O/S unusable.
- Use the above as troubleshooting and reference tips, but use at your own risk!
Tags: #microsoft #image #sysprep #techsupport
![]()

I am running into a similar issue when attempting to remove all apps, aside from Calculator and Photos Viewer. I am only logged in using the default administrator account. When attempting to run sysprep, I get the same error message as you. I haven’t created any other accounts. Mind you, all provisioned apps are removed but the 2 mentioned above, but still getting the same message. Any suggestions?