
This post was originally published on January 23, 2017
The latest update to this post was made 1 year ago.
 Installing .NET 3.5 On Windows 10 Workstations
Windows 10 has .NET 4.5 pre-installed by default, however many applications still in use require the .NET 3.5 framework to be installed. Both 3.5 and 4.5 can run together, installed on the same machine. This article will discuss installing .net 3.5 on Windows 10 workstations and this applies to all versions of Windows 10 to date, including the 1607+ releases. [More On Version Number Info Here].
You can add the .NET 3.5 framework from:
-> (right-click) START -> CONTROL PANEL -> PROGRAMS AND FEATURES -> TURN WINDOWS FEATURES ON OR OFF.
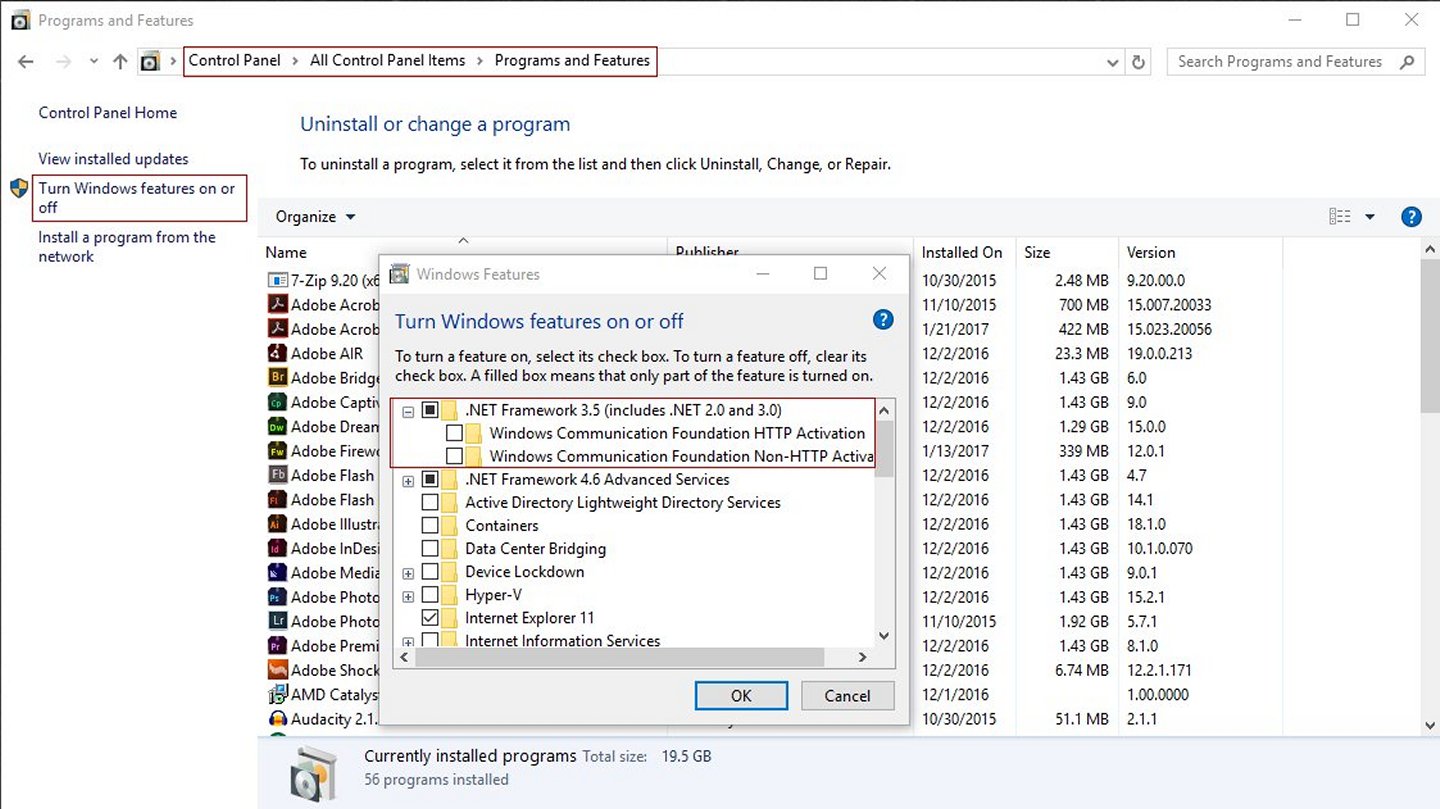 Figure 1 : Turn Windows Features On Or Off (Control Panel)
Click Image For Larger View
For most applications, you can just select the top box, the sub-items are not needed. Once you hit ‘OK’ to move to the next screen, you’ll be presented with a box stating Windows 10 needs to download the files (online install)… This is great, if it worked right… In our case and in many others, we were presented with an error almost immediately, with no other options. Although your error may vary, the simple fact remains… No .NET framework 3.5 for you…
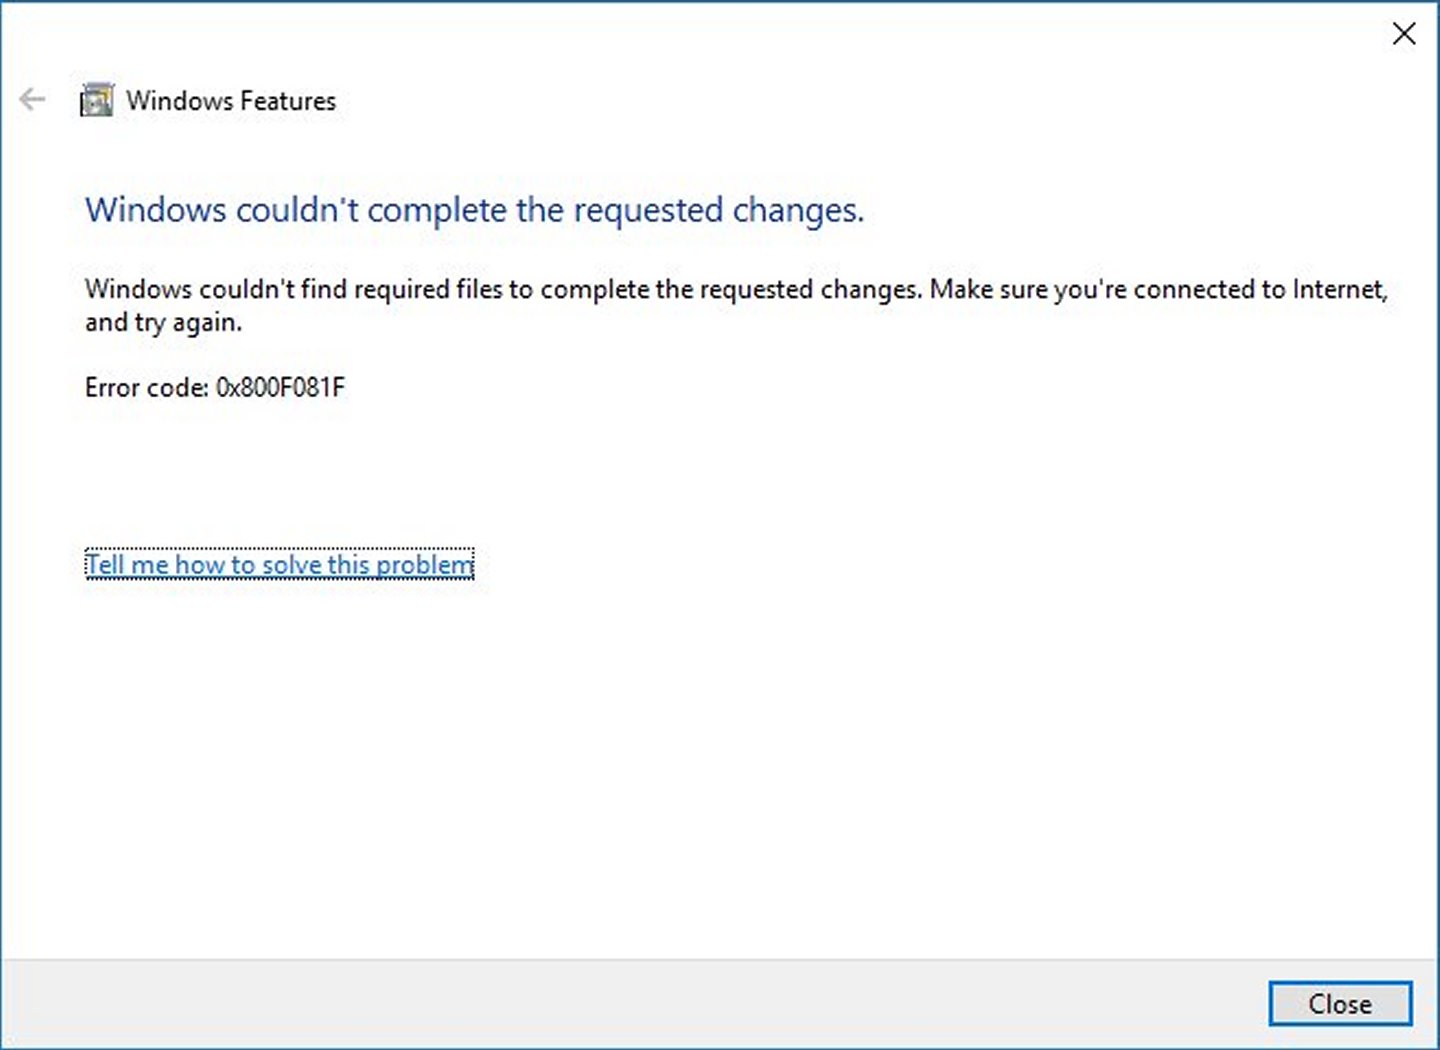 Figure 2 : Failure To Install .NET 3.5 Framework
Click Image For Larger View
To resolve .NET 3.5 installation errors from the TURN WINDOWS FEATURES ON OR OFF area, you will need access to a Windows 10 DVD or Windows 10 .ISO file.
- Insert the DVD, thumbdrive or mount the .ISO so it gets a drive letter.
- Make note of the drive letter your Windows 10 media gets after inserting disc, thumbdrive or after mounting .ISO file.
- You will then open an ‘Admin‘ command prompt:
- (right-click) START -> COMMAND PROMPT (ADMIN).
- Then run the following DISM command:
- dism /online /enable-feature /featurename:NetFX3 /All /Source:f:\sources\sxs /LimitAccess
- NOTE: REPLACE /SOURCE:F:\SOURCES\SXS with the drive letter of your media (in our case, it was F:\)
 Figure 3 : The DISM Installation Running
Click Image For Larger View
The DISM (offline installation) will take about 45-60 seconds to complete in most cases and when completed, you will have the .NET framework 3.5 installed, bypassing any errors the graphic interface might have shown.
Tags: #techsupport #windows10 #dotnet #workstation
![]()
Be the first to comment