This post was originally published on November 15, 2016
The latest update to this post was made 8 years ago.
 Kenmore Elite Front Loading Dryer Repair

You are on page 2/2.
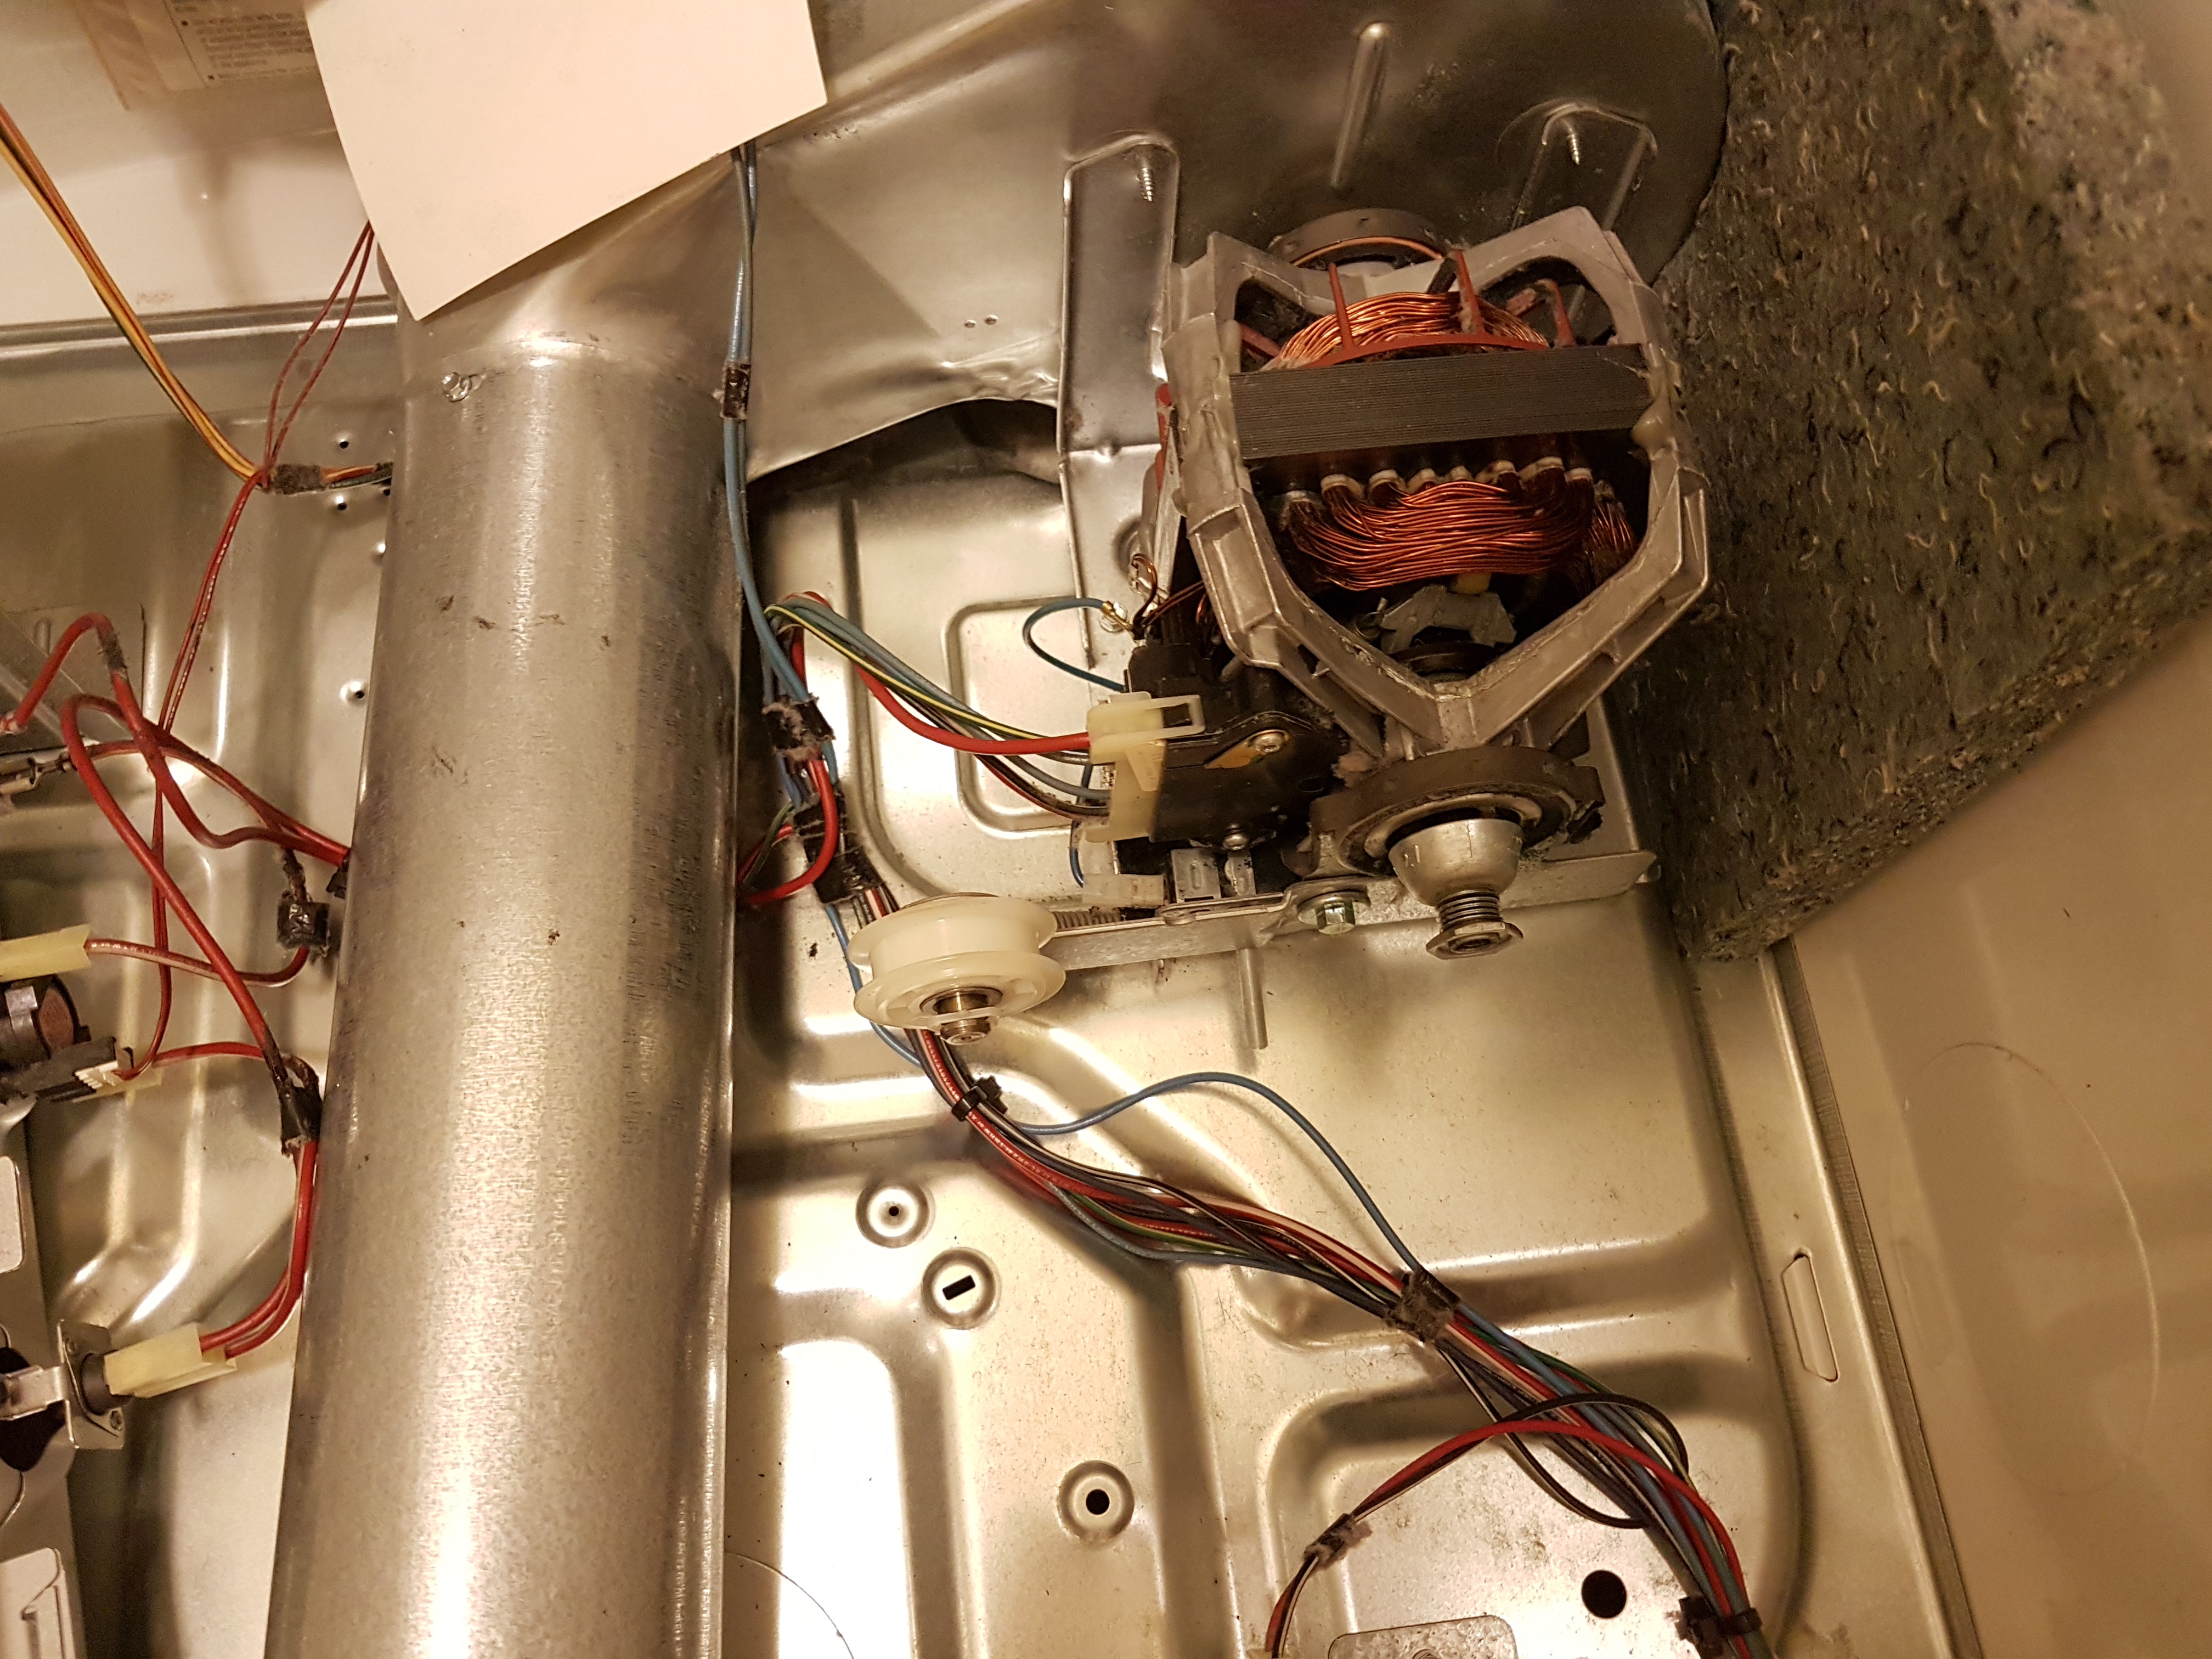
- Step 3 was to get things cleaned up. I used my Dyson vacuum attachment since it is only lint and other debris. This cleaned it right up and it does not hurt to completely satisfy your OCD in this case by getting it all.
- Step 4 is to replace the rollers and tension pulley. Simply remove the triangular clips on each one and the rollers and pulley should slide right off. In my case the tension pulley had slightly seized up and caused the belt to saw into it. The new rollers and tension pulley should slide right on and use the new triangular clips that came with the kit to hold them in place. There is one clip on each side of each roller. My tension pulley came with a triangular clip on the outside and a washer like ring on the inside.
 Figure 2 – showing cleaned up debris and new pulley install.
(Click image to enlarge)
- Last step is to reassemble the dryer in the reverse order. This took me about 1.5 hours to complete and I consider myself handy but I enjoy the time spent fixing stuff potentially extending the endeavor. Now all that’s left is to decide how much you want to pay yourself for your work!
Although your dryer may be a different model or brand, they are all very similar in operation. I hope this guide has been helpful! Leave any comments in the section below!

You are on page 2/2.
Tags: #kenmore #dryer #DIY #doityourself #homerepair #clothesdryer #repair #appliance
![]()

Be the first to comment